Blog Post 2 - Simple Flask Web Development
Hi everyone! In this blog post, I am going to create a simple, interesting Message Bank webapp using Flask. This webapp allows users to submit and view their message on the web page. In this tuturial, I will show you how to create this webapp step by step! Tips: All Web app files has been uploaded to my Github Repository
The skills/languages we will use to create this webapp:
- Python
- HTML
- CSS
- SQL
§1. Enable Submissions
First of all, we need to create a ‘submit’ template with three user interface elements:
- text box 1 - Submit the message
- text box 2 - Submit the name of the user
- A ‘submit’ botton
HTML Files
We first create two HTML files, “base.html”, “submit.html”. We put navigation links inside the template “base.html”, and we then had the “submit.html” extend “base.html”.
base.html
The first template that we are going to create is base template, which create the general layout of the web page.
<!doctype html>
<!-- Link to the CSS stylesheet -->
<link rel="stylesheet" href="{{ url_for('static', filename='style.css') }}">

<!-- This appears at the top of the browser window -->
<title>Blog Post 2</title>
<nav>
  <!-- Web page heading -->
  <h1>A Simple Message Bank By Jeff</h1>
  <ul>
    <!-- Link the submit page on main page -->
    <li><a href="{{ url_for('submit') }}">Submit a Message</a></li>
    <!-- Link the view page on main page -->
    <li><a href="{{ url_for('view') }}">View Messages</a></li>
  </ul>
</nav>

<section class="content">
  <header>
    {% block header %}{% endblock %}
  </header>
  {% block content %}
    <br>
    <p> Welcome to Jeff's simple message bank!
        Click Submit button to submit a
        message and view them by clicking View Message</p>
  {% endblock %}
</section>
submit.html
After we’ve created our base template, we are going to write our submit template. This template will handle the task of submitting the message to the database.
<!--The Submit Message Page Extended from base.html-->

{% extends 'base.html' %}

{% block header %}
  <h1>{% block title %}Enter Your Message and Name{% endblock %}</h1>
{% endblock %}

{% block content %}
    <!-- Creating the three user interfaces within a form tag -->
    <br>
    <form method="post">

      <!-- Create a text box to submit names or handles -->
      <label for="handle">Enter Your Name</label>
      <input type="text" name="handle" id="handle">
      <br>

      <!-- Create a text box to submit a message -->
      <label for="message">Enter Your Message:</label>
      <input type="text" name="message" id="message">
      <br>

      <!-- Creating a submit button -->
      <input type="submit" value="Submit message">
    </form>

{% if thanks %}
			<!-- pop up a thank you message after user submitted -->
    <b>Thank you for submitting a message!</b>
{% endif %}


{% endblock %}
Then, we create a new file “app.py” and write two Python functions for database management:
-
get_message_db(): This function will create the database of messages. This function will first open and connect to a SQL database call
messages_db.sqlite. The database will be stored in our Web App folder. Then, we are going to check whether there is an existing table in the database calledmessages. If themessagestable does not exsit, we will then create thismessagestable using simple SQL command. To achieve this part, we will have to importsqlite3package. The table should includes three columns:-
- id: id number for each data rows. It should be an integer. We will also make it to be
PRIMARY KEYandAUTOINCREMENT. - handle: text. It will store the names after users entered and submitted their names.
- message: text. This column will store the message that users submitted.
- id: id number for each data rows. It should be an integer. We will also make it to be
Don’t forget to close the database at the end!
-
-
insert_message(request): This function will handle inserting a user message into the database of
messageswe’ve create usingget_message_db(). We will first extract the messages and names after the users submitted them. Then, we should connect to ourmessagestable frommessage_db.sqlitethat we have created previously. Next, we are going to use some simple SQL command again to insert the messages and names that users submitted into the table from our database. Names and messages will be inserted into the correspondinghandleandmessagecolumns of the table. Also, Don’t forget to close the database at the end!
Before we start writing our function, we need to make sure we’ve imported necessary packages. Also, we should create an instance of the Flask class with the name of our web app module. This will enable Flask to locate our template and static/CSS file.
# Import required packages
from random import random
from flask import Flask, g, render_template, request
import sqlite3

app = Flask(__name__)
Then, let’s define our get_message_db() function
get_message_db()
def get_message_db():
    '''
    This function check whether there is a
    database call "message_db". If not, we connect to
    that database.
    '''
    # open a database to store the messages
    if "message_db" not in g:
        g.message_db = sqlite3.connect("messages_db.sqlite")
    cursor = g.message_db.cursor()

    # Check whether a table called messages exists in message_db
    # Create this table if not
    cmd = "CREATE TABLE IF NOT EXISTS \
    messages (id integer PRIMARY KEY \
    AUTOINCREMENT, handle text, message text)"
    cursor.execute(cmd)

    # Don't forget to close the database
    cursor.close()
    return g.message_db
Next, we define “insert_message(request)” function.
insert_message(request)
def insert_message(request):
    '''
    This function handle inserting a user message
    into the database of messages.
    '''
    # Extract message and handle
    input_message = request.form['message']
    input_handle = request.form['handle']

    # Insert the message into the message database
    # using a cursor
    db = get_message_db()
    cursor = db.cursor()
    # execute the SQL command to insert the message and handle
    # into the corresponding columns of the table in the database.
    cursor.execute(f"INSERT INTO messages (handle, message) \
        VALUES (?, ?)", (input_handle, input_message))

    # Ensure that the row insertion has been saved
    db.commit()

    # Close the database
    db.close()
Then, we need to go back to our app.py file and add a route decorator because this will helps the Flask the locate the url we want for each page. For example, app.route("/") will help the Flask to locate the url of the main page. app.route("/submit/") will help Flask to find the url of the submit page.
Then, we will update our “app.py” file by defining main() and submit() functions.
The main() function will look like below. it define the url for the main page and render the base template base.html file.
main()
# Define main() function
@app.route("/")
def main():
    '''
    This function set the base template
    to be the home page
    '''
    return render_template('base.html')
submit()
Then, the submit() function should look like the code below. Our submit() method will render the submit template submit.html and direct all POST requests to the insert_message() function (if users submitted any messages). If users successfully submit their messages and names, we will then show a “thank you” message on the screen. We will do this by passing the arument thanks=True.
# Define submit() function so that we can put the message into
# the database
@app.route("/submit/", methods=['GET', 'POST'])
def submit():
    '''
    This function allow us to submit the name
    and message into the database.
    '''
    # Jump to the submit page if we receive "GET" methods
    if request.method == 'GET':
        return render_template('submit.html')
    # Insert messages into database if "POST" request
    # And return to submit template after submitting message
    else:
    		# Insert messages
        insert_message(request)
 				# return render_template(), pass the `thanks` argument
        # to say thank you after users submitted their messages.
        return render_template('submit.html', thanks=True)
§2. Viewing Random Submissions
In first part, we’ve create the ‘base’ and ‘submit’ templates, and we’ve also updated ‘main()’ and ‘submit()’ methods in the ‘app.py’ file. Now in second part, we are going to write a ‘view’ template to randomly view our submissions.
random_messages()
We first write a function in ‘app.py’ file called random_messages() to return a collection of n random messsages from the database ‘message_db’. This function handle “viewing message” task. It will randomly selected n messages from our database’s message table. Now, let’s go ahead and write our random_messages() function in our app.py file.
def random_messages(n):
    '''
    This function return a collection
    of n random messages from the 'message_db'
    # First we connect the database
    '''
    # connect to the database
    db = get_message_db()
    # create the sursor object using cursor() method
    cursor = db.cursor()
    # execute the SQL command to select n random messages
    n_random_message = cursor.execute(f'SELECT message, \
        handle FROM messages ORDER BY RANDOM() LIMIT {n}').fetchall()

    # Close the database
    db.close()
    # return n random messages
    return n_random_message
view()
Then, we define view() method to let the users randomly view 5 submissions. We will first add a route decorator for view page. Then, our function will implements the random_messages() function that we’ve writeen above. It will take the results messages from the random_messages() function and then pass those messages to our view template view.html page.
# Define view() function
@app.route("/view/", methods=['GET'])
def view():
    '''
    This function allow us to pass
    the random messages as an argument to
    render_template().
    '''
    return render_template("view.html", messages = random_messages(5))
view.html
We then write our view template “view.html”, and it should also extend “base.html”.
<!--The View Page Extended from base.html-->
{% extends 'base.html' %}

{% block header %}
    <!-- Title -->
<h1>{% block title %}Some Cool Messages{% endblock %}</h1>
{% endblock %}

{% block content %}
  {% for m in messages %}
  <br>
  <b>{{m.1}}</b>
  <br>
  <i>- {{m.0}}</i>
  <br>
  {% endfor %}
{% endblock %}
§3. Customize Your App
To make our app more beautiful, we can customize our web app by editing the CSS.
style.css
html {
    background: rgb(249, 205, 173);
    padding: 1rem;
    font-family: Monospace;
    font-size: x-large;
}

body {
    max-width: 900px;
    margin: 0 auto;
    line-height: 1cm;

}

h1 {
    color: rgb(23, 23, 24);
    font-family: cursive;
    margin: 1 auto;
    text-align: center;
    padding: 1rem;
}

nav {
    padding: 0 1rem;
    border-radius: 25px;
    max-width: 5000px;
}

nav ul li a {
    display: block;
    padding: 0.4rem;
}


input {
    outline-style: none;
    border-radius: 3px;
}

a {
    text-decoration: none;
}
Let’s see some screenshots of our web app! Also, we should remember to activate the appropriate PIC16B conda environment and navigate to the directory where app.py file located at. After activate the conda environment, we run the following code in the terminal before we test our web app.
conda activate PIC16B
export FLASK_ENV=development
flask run
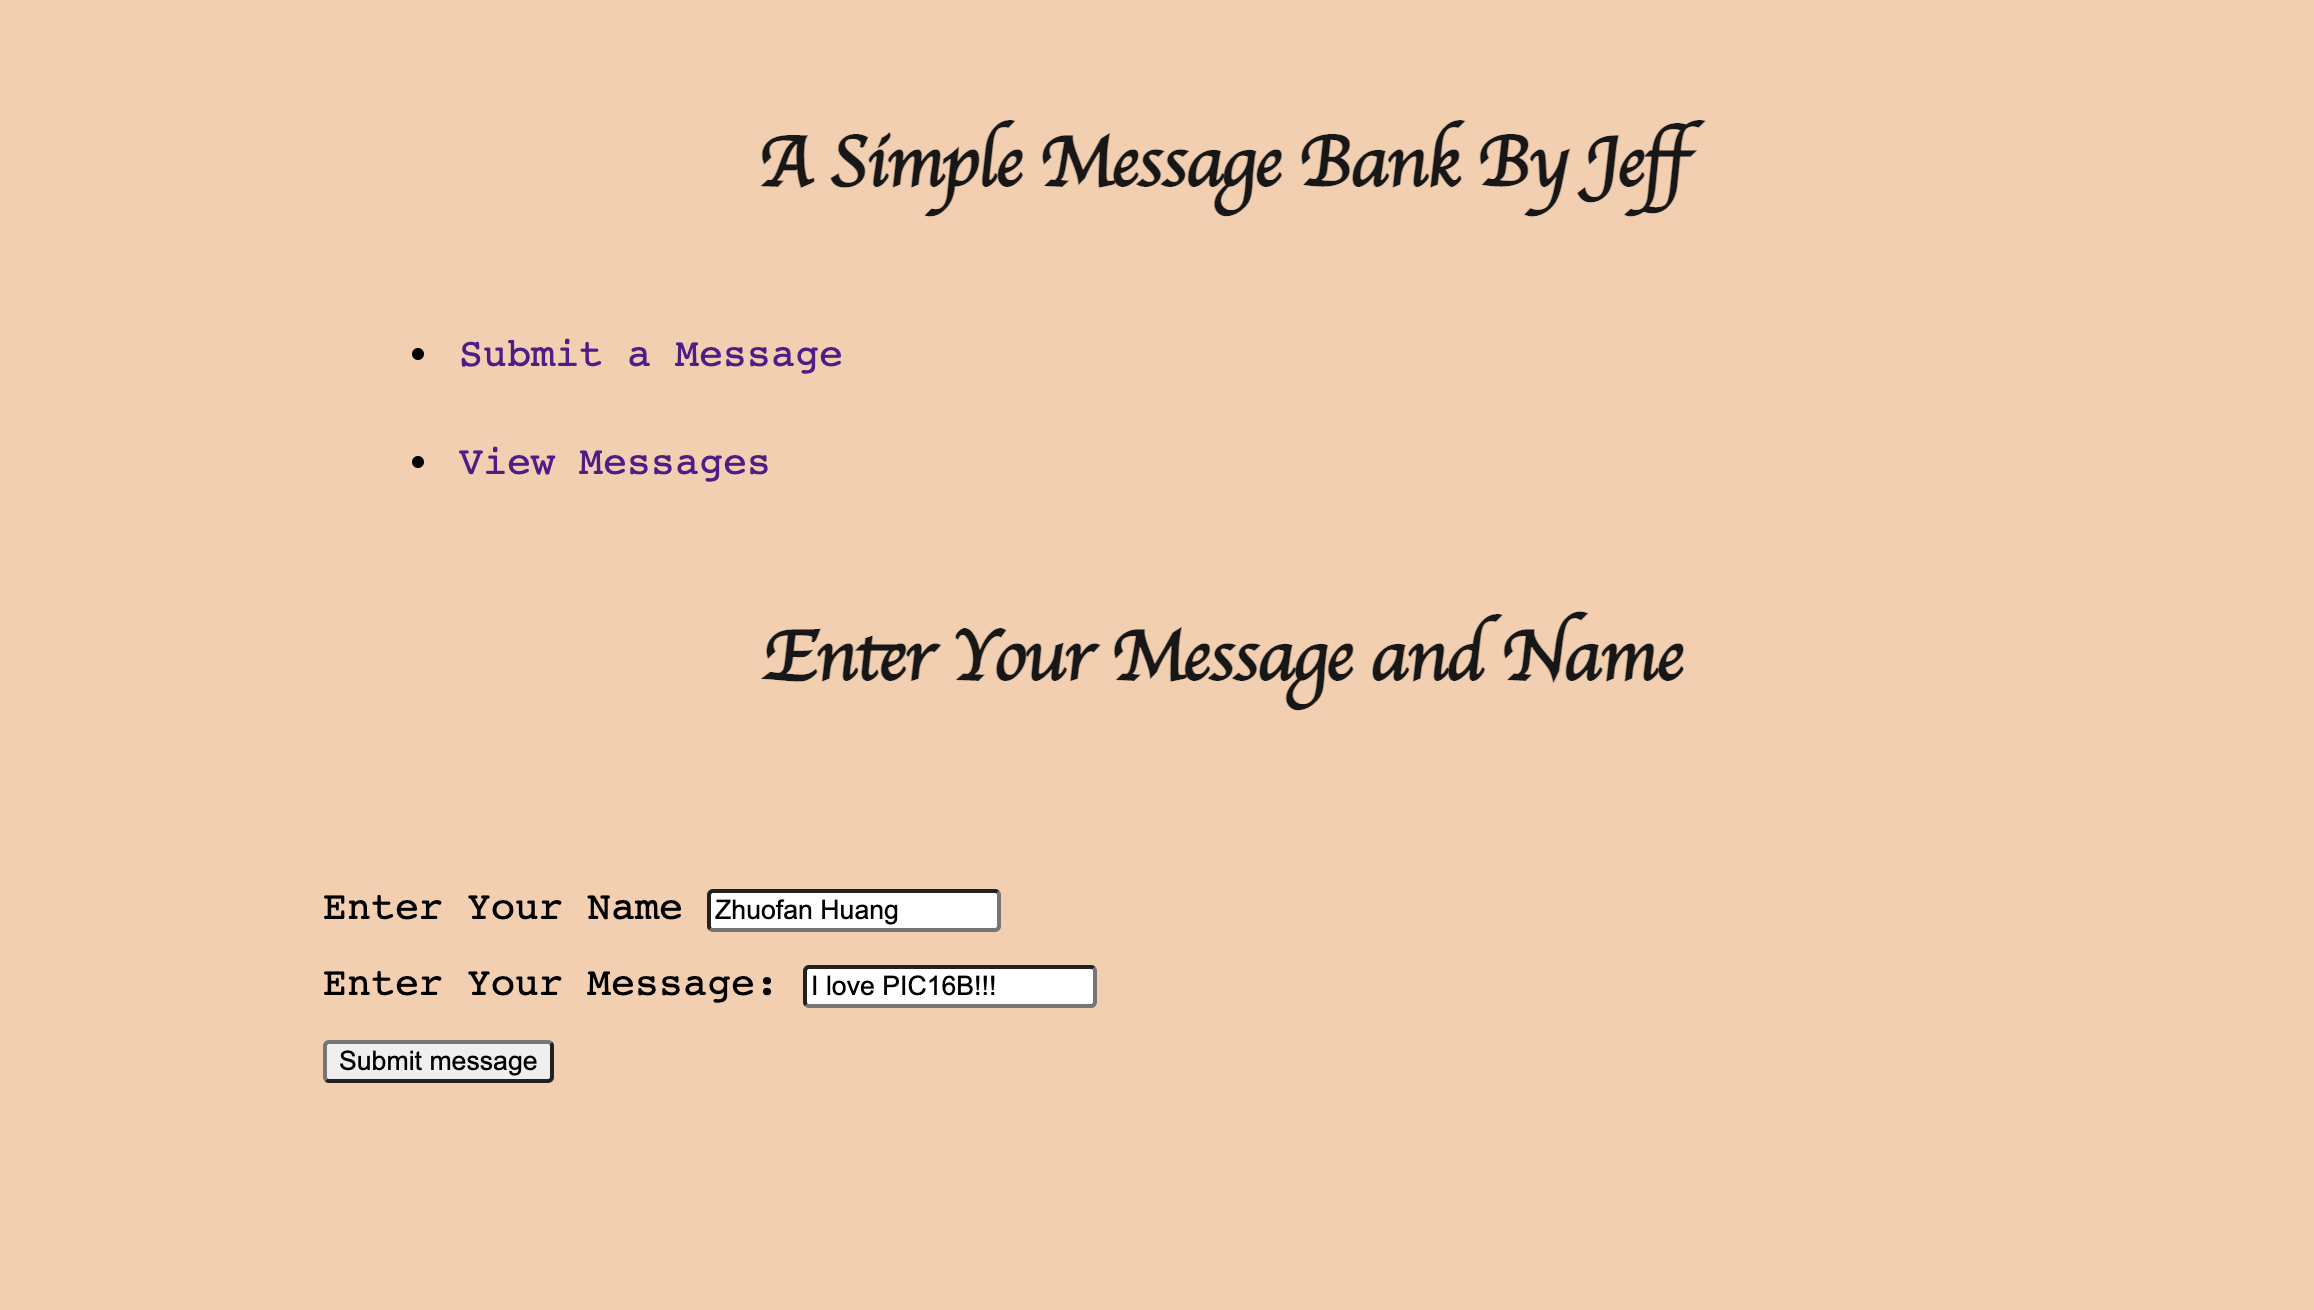
Screencap 1 - Example of a user submitting a message
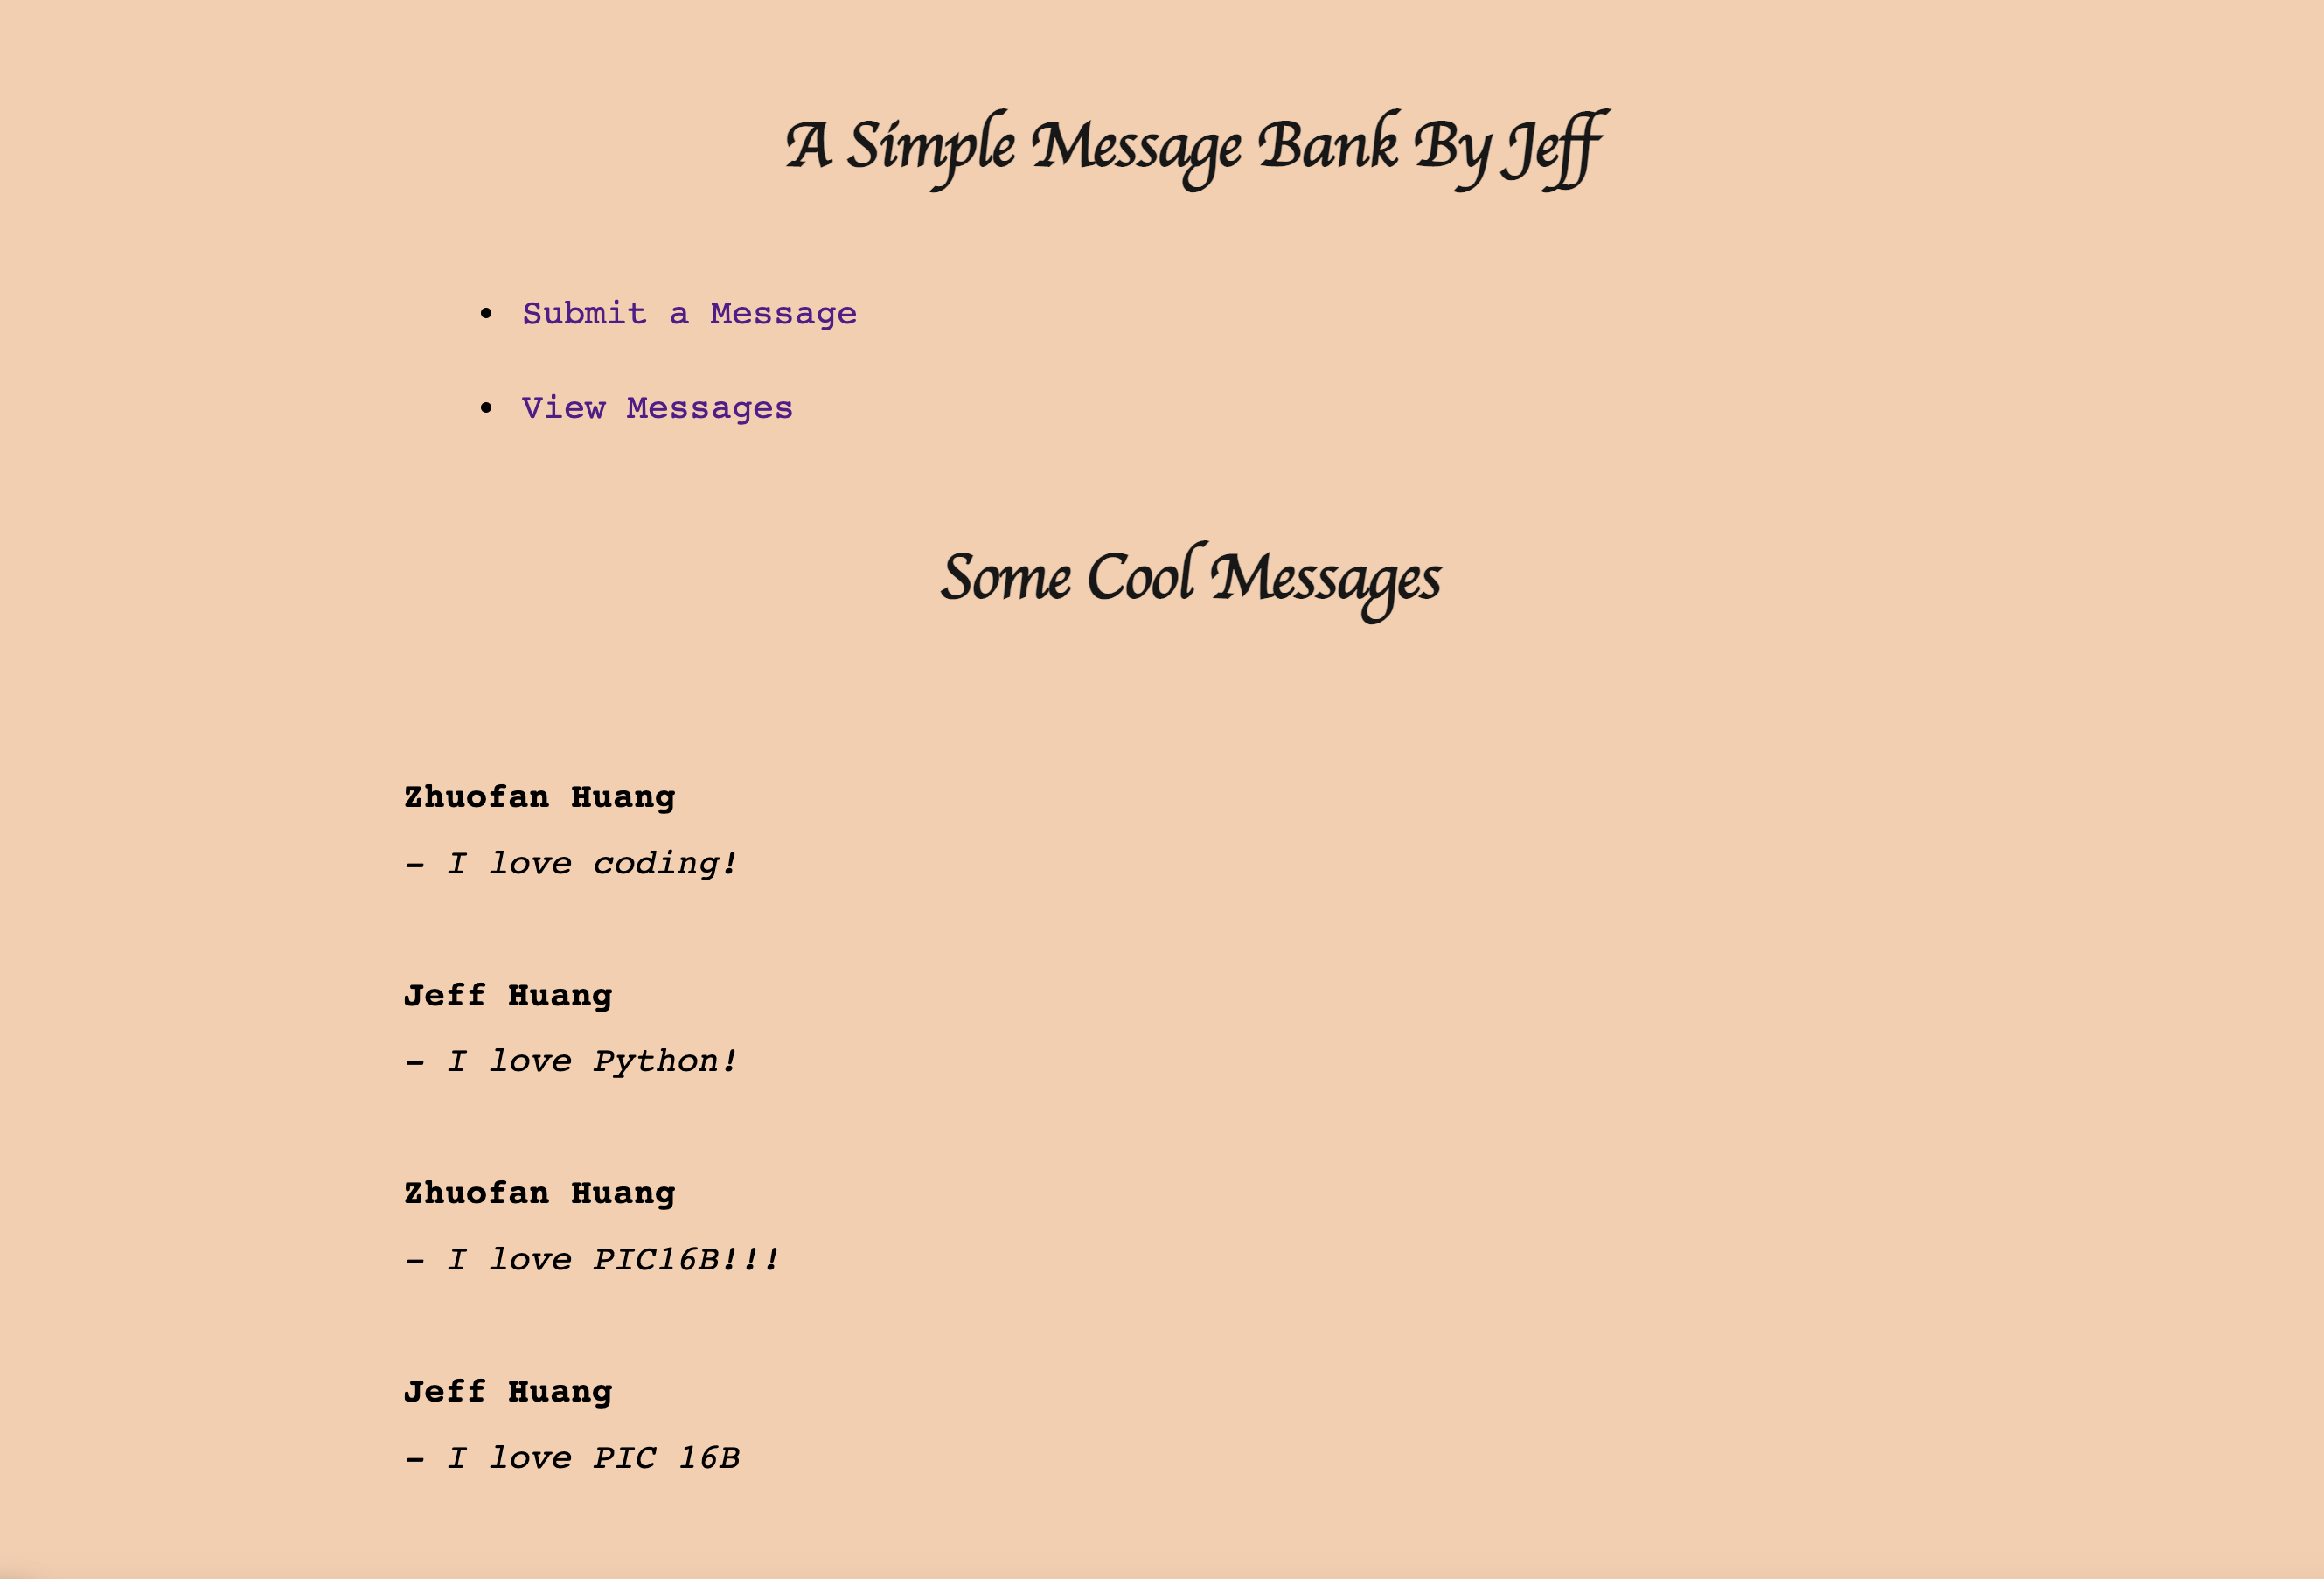
Screencap 2 - An example of a user viewing submitted messages
§4. Discussion of Submit Template
The ‘submit’ template allows users to submit their names and messages into the database that we’ve created. After the users typed their name and message, they could simply click the Submit button on the submit.html page. By clicking the submit button, the name/handle and the message that they typed will be inserted into the database ‘messages_db.sqlite’. If this database does not exist ever, it will be created when the user first time clicks the “submit” button. This behavior is a type of “POST” request. We’ve also defined the “submit()” method in our ‘app.py’ file. This function will allow the web app to decide what it should do based on the POST/GET request. More specifically, when the user clicks the submit button, a POST request will be sent to the web app. Furthermore, when a user successfully submits their name and message, the web app will automatically pop up a text to say thank you to the user for submitting the message.
§5. Link to the Github Repository
The following link is the Github repository containing the code of my Webapp: https://github.com/jeff1hwang/Flask-Python-WebApp